| |
|
|
|
|
|
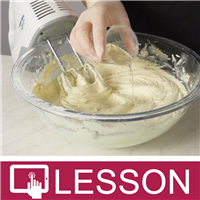
| How to Make Whipped Body Butter |
Author: Wholesale Supplies Plus
Friday, December 23, 2022 |
|
Learning how to make whipped body butter allows you to add a customer favorite to your product line. Not only is whipped body butter decadent, it also moisturizes and nourishes the skin. Keep reading to find our most recommended ingredients, equipment to have on hand, and the best additives. As you learn how to make body butter to sell, we'll teach you how to formulate your own recipes and also walk you through the process of no-melt vs melt methods.
Benefits of Body Butters on Your Skin
Body butter has become increasingly popular thanks to the various benefits it has on your skin. It's an incredible moisturizer that doesn't leave your customers' skin feeling greasy. It can reduce visibility of both wrinkles and stretch marks while also helping fight against rashes, eczema, and other skin conditions. And by using natural ingredients, your customers will feel confident knowing that they're not rubbing any harsh chemicals into their skin.
Equipment Needed:
- A heat-safe container
- Scale to weigh ingredients
- Spatula or spoon
- Stand mixer or hand mixer
- Hair net and gloves
Whipped Body Butter Base Ingredients
Whipped body butter formulations are mostly made with butters and solid oils. You can incorporate smaller amounts of liquid oils to add additional properties to your whipped body butter. If you add too much liquid oil, it will lower the melt point of your whipped body butter and it will melt too easily. It's important to get an accurate sense of the best butter to oil ratio for body butter when creating your recipe. Butters - Butters add protective barriers to the skin and help to add emolliency to whipped body butter. Butters can include shea butter, cocoa butter, mango butter, or any other natural cosmetic based butter or butter blend. Some commonly used butters: - Cocoa Butter - Cocoa butter is thought to reduce skin dryness and improve elasticity.
- Shea Butter - Shea butter has a high vitamin and mineral content, which is thought to benefit dry skin.
- Mango Butter - Mango butter is thought to exhibit excellent moisturizing properties.
- Tucuma Butter - Tucuma butter is considered to have high levels of Lauric, Myristic and Oleoic fatty acids, which are all thought to moisturize the skin.
- Kokum Butter - Pure kokum butter is considered to be up to 80% of stearic-oleic-stearic (SOS) triglycerides, which are thought to prevent dry skin. It's one of the most stable and hardest vegetable butters known.
- Shorea (Sal) Butter - Contains high levels of uniform triglycerides, which are thought to help with oxidation and stability in formulations.
Solid Oils - Solid oils are nice in whipped body butter and help them remain stiff and whipped. Some examples: Liquid Oils - Choose oils that have a long shelf life. Different oils offer different results in whipped body butter based on their properties. Some examples include: Lighter oils - Medium oils - Heavier oils - Additives for Whipped Body Butter
Additives that are oil-soluble can be worked into your whipped body butter formulations. Never add anything water-based, as it will separate out from the body butter. Some successful additives include: Fragrance - You can fragrance whipped body butter using both fragrance oils and essential oils. The typical usage rate for both is about 2% of the total recipe, but double check IFRA guidelines to make sure you comply. Vitamin E - Vitamin E T-50 is an excellent antioxidant for products containing oils. The usage rate for vitamin E is 1%. Tapioca Starch Powder - Tapioca starch in whipped body butter helps to cut down on the greasy feeling. The usage rate is 1 tsp. for every 4 oz. (115 g) of body butter base. How to Formulate a Whipped Body Butter Recipe
You can formulate your own whipped body butter recipe by using the percentages below.
Butter to oil ratio:
Begin by creating the whipped butter base. We recommend starting with the following butter to oil ratio:
75% Butter
25% Solid Oils*
*You can experiment with adding in liquid oil for part of the solid oils, but it will change the stiffness of the mixture.
Start by heating your butter to approximately 120 to 140 degrees Fahrenheit. As you stir, add in the oil until both ingredients are fully integrated into each other.
Once you have created a desirable base, incorporate additives at the percentages/amounts listed.
2% Fragrance oil
1% Vitamin E
Tapioca Starch Powder - 1 tsp. / 4 oz. body butter base
Continue stirring over heat as you mix in these additives. Once all of your ingredients are incorporated, remove the body butter base from heat and continue to stir as the mixture cools. Then you'll be ready to whip.
The details of this process vary slightly depending on the melting point of your butter. Keep reading for our melt vs. no-melt whipped body butter formulations.
It is important to remember that harder butters create a more solid whipped butter with a higher melt point and liquid oils can reduce that melt point. Keep the use of liquid oils low, and be sure to pair them with harder butters such as kokum butter, shorea (sal) butter and cocoa butter.
Related Recipes:
Basic Body Butter*
Refined Shea Butter - 15 oz.
Coconut Oil - 5 oz.
Fragrance - 0.4 oz.
Tapioca Starch - 5 teaspoons
Vitamin E - 1.5 teaspoons
Cranberry Butter Blend Whip*
Cranberry Butter Blend - 15 oz.
Coconut Oil - 4 oz.
Macadamia Nut Oil - 1 oz.
Fragrance - 0.4 oz.
Tapioca Starch - 5 teaspoons
Vitamin E - 1.5 teaspoons
Kokum Butter Whip
Kokum Butter - 12 oz.
Refined Cocoa Butter - 5 oz.
Avocado Oil - 3 oz.
Fragrance - 0.4 oz.
Tapioca Starch - 5 teaspoons
Vitamin E - 1.5 teaspoons
Mango Butter Whip*
Mango Butter - 15 oz.
Almond Butter Blend - 4 oz.
Jojoba Oil - 1 oz.
Fragrance - 0.4 oz.
Tapioca Starch - 5 teaspoons
Vitamin E - 1.5 teaspoons
*These recipes do not require you to melt butters prior to mixing
Some Considerations When Making Whipped Body Butter
Packaging Whipped Body Butter Whipped body butter is typically packaged in jars so that the user can scoop out as needed and apply to skin. It is important to note that since air is whipped into the body butter, product weight is about ½ of what the container is specified for. For example, 4 oz. of whipped body butter will fit into an 8 oz. plastic jar depending on how much you whip it. - Plastic Jars - There are a variety of plastic jars that can be filled with whipped body butter ranging from straight-side tall jars to lower profile squatty jars.
- Deli Tubs - Deli tubs are an adorable way to package whipped body butter. It almost looks like a container of ice cream when packaged.
No Melt vs Melt Process Comparison
When you are using shea butter, mango butter, and most of the fancier butter blends, you don’t need to melt prior to mixing. They are soft enough to whip. Sometimes higher melt point butters/oils will require that you melt prior to mixing. These include cocoa butter, kokum butter, sal butter, palm kernel oil, and babassu oil. Even softer oils stored at chilly room temperatures will need to be softened before whipping. No Melt Whipped Body Butter: Basic ProcessUse this process when your recipe consists of shea butter, mango butter, and other soft butters or blends. Step 1 - Place all of the ingredients into a mixing bowl. Step 2 - Whip using a stand mixer or hand mixer for about 10 minutes or until all ingredients have combined and doubled in volume by whipping. Step 3 - Spoon into containers. Step 4 - Label your product and include the following information: - Product name
- Net weight size
- Directions for use
- Ingredients in descending order of predominance
- Company name
- Contact information
Melt Whipped Body Butter: Basic ProcessUse this process when your recipe contains hard or brittle butters. Step 1 - Melt hard and brittle butters. Step 2 - Add other softer butters or oils. Mix well. If mixture starts to thicken, you can start whipping. If the mixture is still clear and hot, put it into the fridge for a short time to drop the temperature to where the mixture is starting to solidify. Step 3 - Remove from the fridge and add all of the additives (fragrance, tapioca starch, vitamin e). Step 4 - Whip using a stand mixer or hand mixer for about 10 minutes or until all ingredients have combined and doubled in volume from whipping. Step 5 - Spoon into containers. Step 6 - Label your product and include the following information: - Product name
- Net weight size
- Directions for use
- Ingredients in descending order of predominance
- Company name
- Contact information
 |
| Buy Supplies - Related Items |
|
Questions & Answers (17) |
|
| Question + Answer. Here you can ask or answer questions All questions are queued and answered quickly during business hrs. You can also answer questions posted by other customers if you have valuable information. |
 |
17 Question(s) Shown Below |
No items listed at this time, please check back often as we are adding kits/items everyday.
|
|
|
|
|
|
|