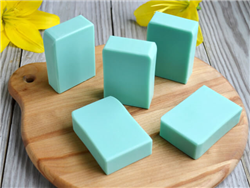
In the realm of homemade beauty products, the aesthetics of your creation play a significant role in its appeal. Tall and skinny soap molds are particularly popular for their elegant, sleek bars that stand out in any bathroom decor. The process of making these molds yourself is not only easy but also incredibly rewarding. Let's explore how you can create a DIY soap mold that caters to this distinctive shape.
How to Make a Tall & Skinny Soap Mold
Why opt for a DIY tall & skinny soap mold? Beyond the unique shape they impart to your soap bars, crafting your own molds allows for customization to fit your specific needs and preferences. Additionally, utilizing materials you already have contributes to a more sustainable practice by reducing waste.
INFORMATION- Difficulty: Easy
- Yield: 1 Mold and 1 Liner
Incorporating a DIY soap making mold into your toolkit is a straightforward project that requires minimal materials and yields significant rewards.
TIMING- Prep Time: 5 Minutes
- Perform Time: 45 Minutes
- Total Time: 50 Minutes
The process is quick, making it an excellent project for those looking to efficiently add to their soap-making supplies without sacrificing significant time.
SUPPLIES- Cereal Box
- Piece of Corrugated Cardboard (Around 10″ x 10″ or bigger; For support on sides of mold)
- Marking Tool (pen, pencil, or marker)
- Ruler
- X-Acto® Knife
- Scissors
- Cutting Mat
- Glue
- Rubber Bands
- Packaging Tape
- Masking Tape
- Freezer Paper (found with paper and plastic wrap in household items sections in stores)
These common household items transform into the components of a reliable cardboard soap mold with a bit of creativity and handiwork.
Directions
Step 1 – Mark & Cut Box: Initiate your DIY soap mold project by marking 3 ¾ inches up from the bottom of a cereal box, creating the initial dimensions for your tall skinny soap mold. Carefully join the lines with a ruler and use a sharp X-Acto® Knife or scissors to cut. This step forms the base of your mold, crucial for shaping those elegant, tall, and skinny soap bars. Precision here is key, as the cleaner your cuts, the more refined your final soap bar will look.
Step 2 – Mark and Cut Corrugated Cardboard Support: The stability of your mold is paramount. To ensure that your tall and skinny soap maintains its shape, cut a piece of corrugated cardboard to serve as a support system. Measure and mark the cardboard, cutting it to fit snugly against the inside walls of your cereal box mold. This step reinforces the mold's structure, preventing any bulging or warping that can occur during the soap curing process.
Step 3 – Fit Corrugated Cardboard to Sides of Box: Once your supports are ready, apply a generous amount of glue to attach the corrugated cardboard to the inside walls of your box. Use rubber bands to secure the cardboard in place as the glue dries. This added support is essential for crafting a reliable, durable cardboard soap mold that can be used multiple times, making it an invaluable addition to your collection of homemade soap molds.
Step 4 – Make Freezer Paper Liner(s): Customizing a liner for your mold ensures easy removal of the soap after curing. Measure and cut freezer paper according to the dimensions of your mold, allowing for an overhang to facilitate easy lifting. The shiny side of the freezer paper should face inward, acting as a non-stick surface that’s perfect for smooth soap release. This step is crucial for maintaining the integrity of your soap's tall and skinny shape, making the liner an indispensable component of your DIY soap making mold.
Step 5 – Tape to Reinforce Corners: After the glue has thoroughly dried, remove the rubber bands and reinforce the mold's corners and seams with packaging tape. This additional step solidifies the mold's structure, ensuring that it can withstand the pressure of the soap mixture and retain its shape during the soap-making process. It's a simple yet effective way to extend the life of your cardboard soap mold.
Step 6 – Make Liner: Careful folding and cutting of the liner not only ensure a snug fit within the mold but also guarantee a smooth surface for your soap. Follow the dimensions carefully, making precise folds and cuts where necessary. This attention to detail will reflect in the quality and appearance of your final product, showcasing the craftsmanship behind DIY soap molds.
Finishing Touches: With your mold assembled and liner in place, you’re ready to embark on the soap-making process. This DIY tall & skinny soap mold is not just a testament to your ingenuity but also a step towards sustainable crafting. Reusable and efficient, it stands as a hallmark of personalized soap production.
Other Items to Use as A Homemade Soap Mold
Broadening the horizon of DIY soap molds, explore the use of alternative household items.
Silicone baking molds, PVC pipes, and sturdy
plastic containers can all serve as innovative molds, each offering unique shapes and textures to your soap creations. These alternatives not only diversify your soap-making repertoire but also encourage the repurposing of items, aligning with eco-friendly practices.
Incorporating these detailed steps into your soap-making process enriches your experience and enhances the quality of your homemade soaps. Whether you’re creating soaps for personal use, gifts, or small business inventory, these tailored tips and techniques ensure that your products stand out with their professional finish and personal touch.